23 years ago this month, Microsoft announced the initial developer availability (essentially, the “alpha” release) of the .NET Framework and Visual Studio .NET. Being in attendance at the 2000 Microsoft PDC (Professional Developer Conference), I received a set of CDs containing the pre-release bits for .NET, including C#. I’ve been writing C# ever since!
Side Note: While C# has been my primary language for a couple of decades now (wow!), it is not the only language I make use of. C# is a very capable language, but there are many other languages out there that can be a better fit, depending on what your goals are.
Having written C# code for years, I’ve found myself on many occasion wishing I could also use C# in a command shell or terminal – much like how we utilize PowerShell. Not necessarily to manage the directories and files on my PC (though, I suppose you could) but, rather, to work through some quick code experiments or algorithms. For example, maybe I want to test out a new framework class or method I just read about and don’t want to fire up Visual Studio .NET/Code just to run a couple lines of code.
Enter: C# REPL
C# REPL is…
A cross-platform command line REPL for the rapid experimentation and exploration of C#. It supports IntelliSense, installing NuGet packages, and referencing local .NET projects and assemblies.
C# REPL is a .NET 7 global tool that can run on Windows, macOS, and Linux. Installing C# REPL can be achieved with a single command:
dotnet tool install -g csharpreplOnce installed, you can start C# REPL by running the command csharprepl:
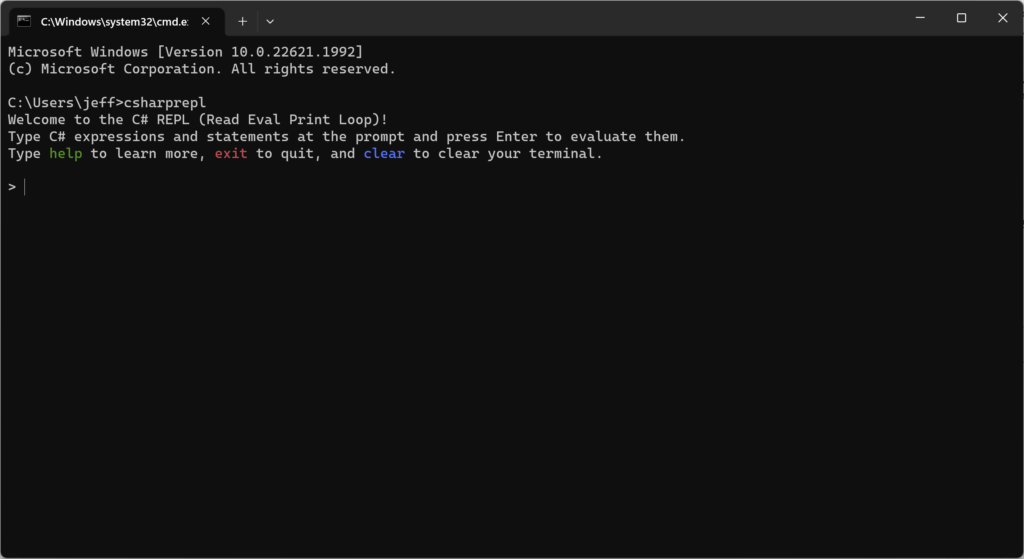
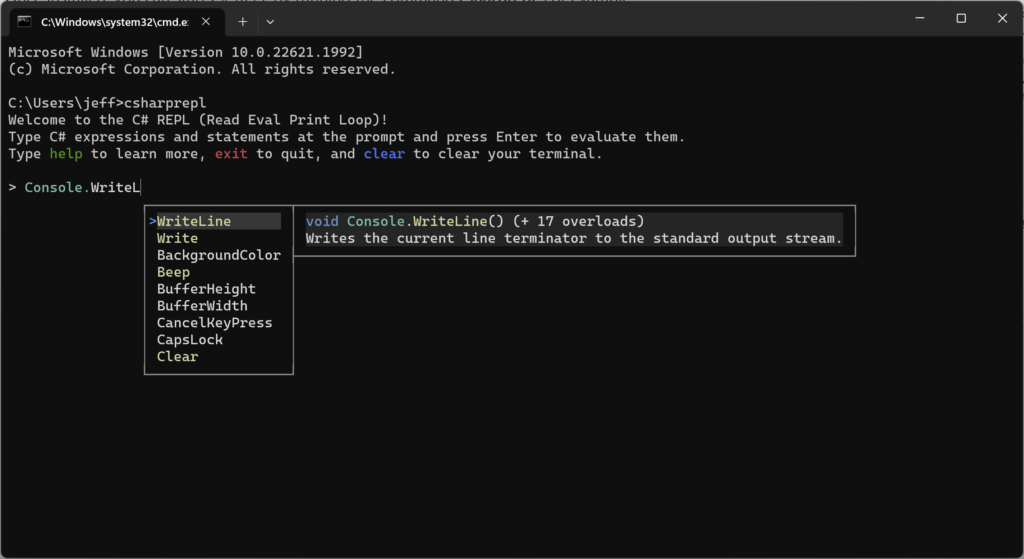
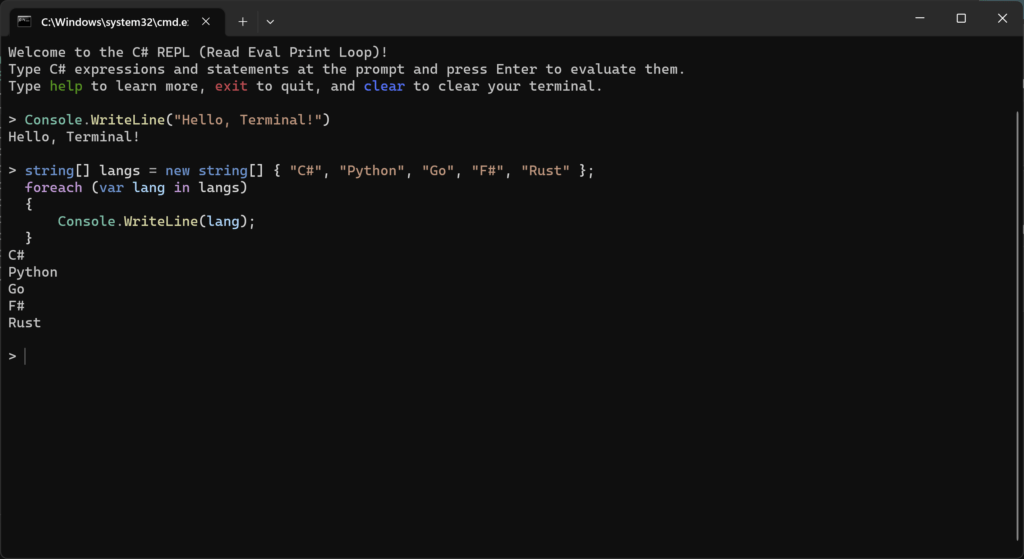
At this point, you can start typing C# code and executing it. As you type, IntelliSense will continually provide valid options based on the current context of the code you are writing.
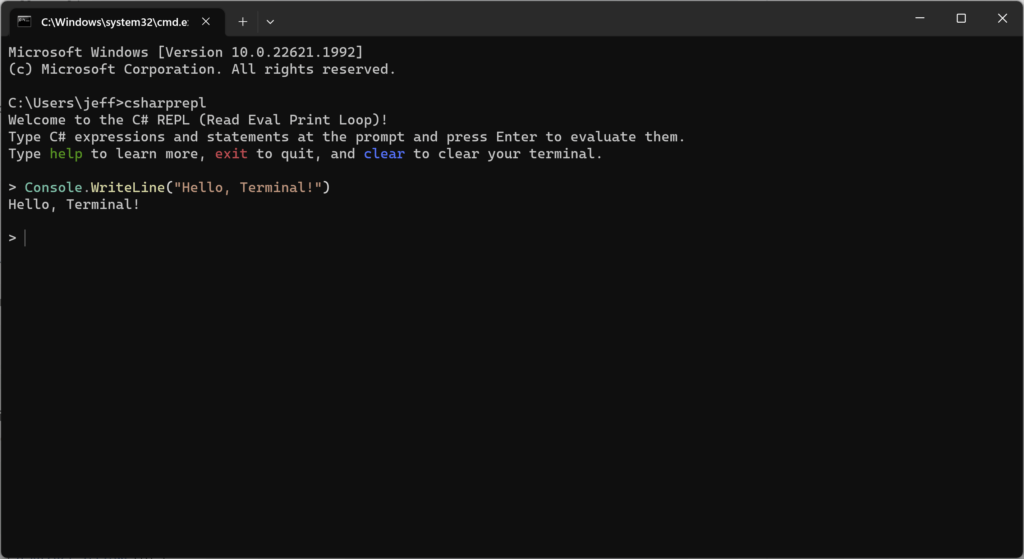
Pressing Enter will execute the code.
To work with multiple lines of code, press Shift + Enter for each line and Enter when you are ready to execute the code.
What Else?
At this point, you know enough to start writing C# code in your Terminal. However, there’s more to C# REPL, such as:
- Configuring Themes and Colors
- Adding References
- Mastering the Keyboard Shortcuts
- And more!
Integration with Windows Terminal
One final step that I’ve found to be super helpful is to setup a C# REPL profile within the Windows Terminal for quick access. To setup a C# REPL profile, follow these steps:
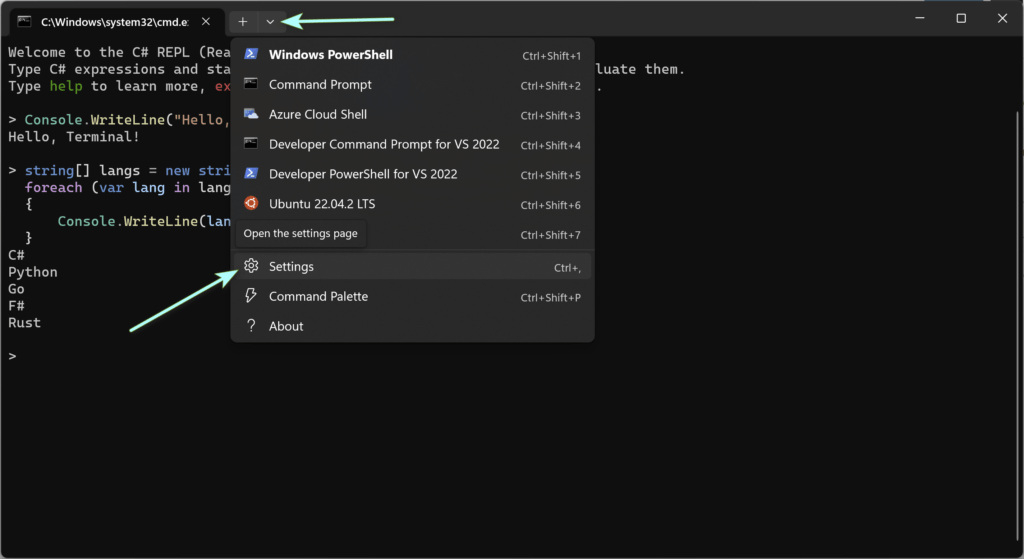
Step 1: Within the Windows Terminal, click on the “down arrow” and then Settings:
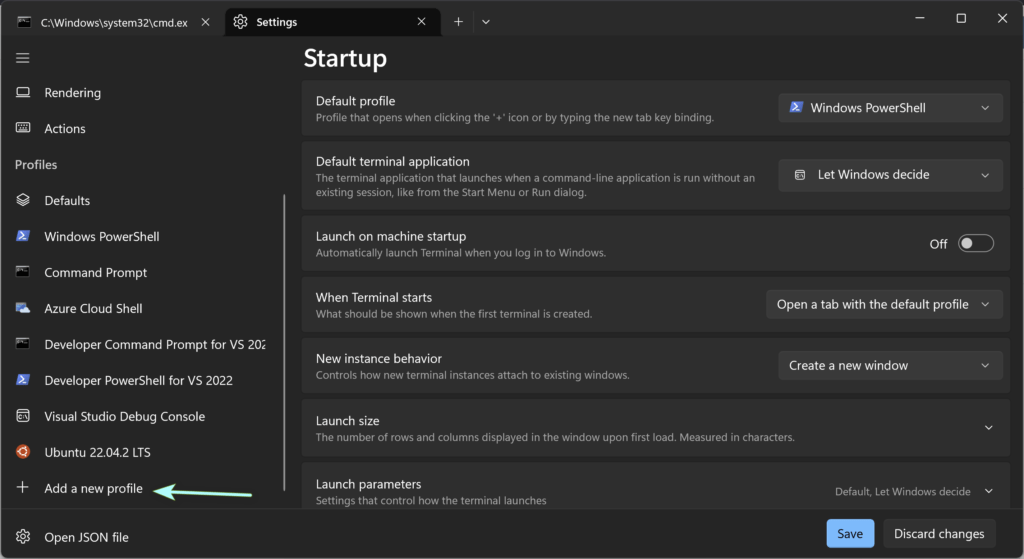
Step 2: Click on Add a new profile:
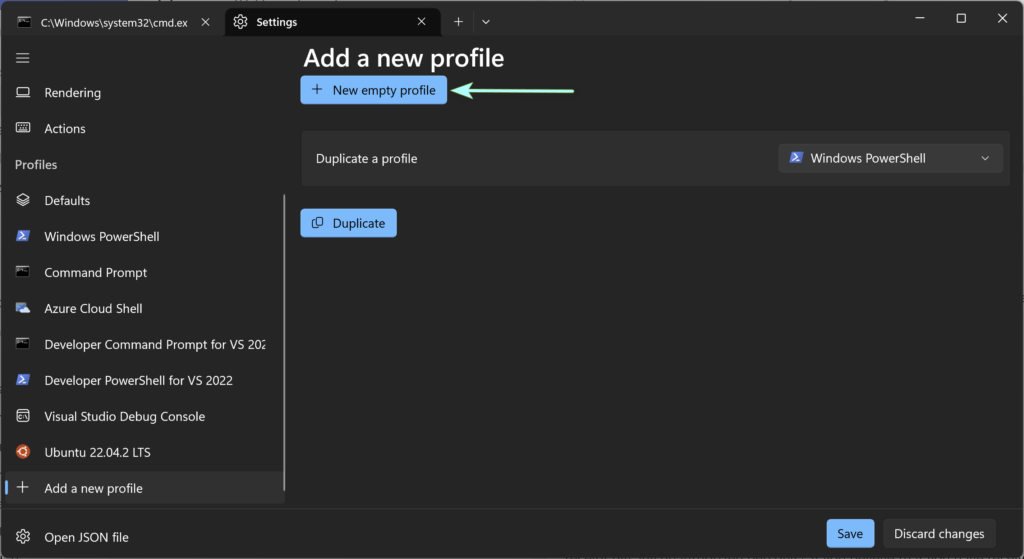
Step 3: Click on New empty profile:
Step 4: Enter a profile name, such as C# REPL, and specify the command line: csharprepl.exe and press Save:
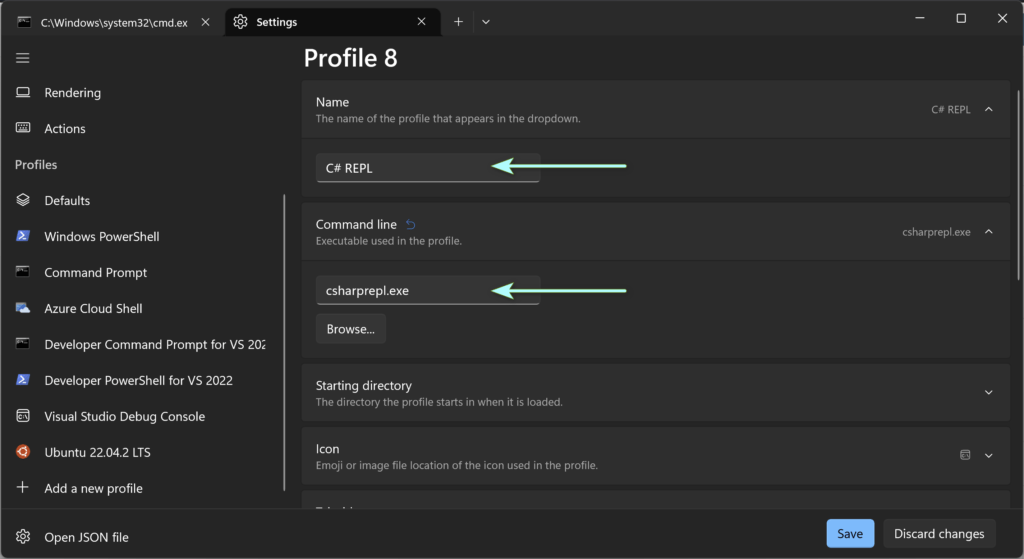
Close the Settings tab.
You can now select the C# REPL profile when you click on the “down arrow” to add a new tab:
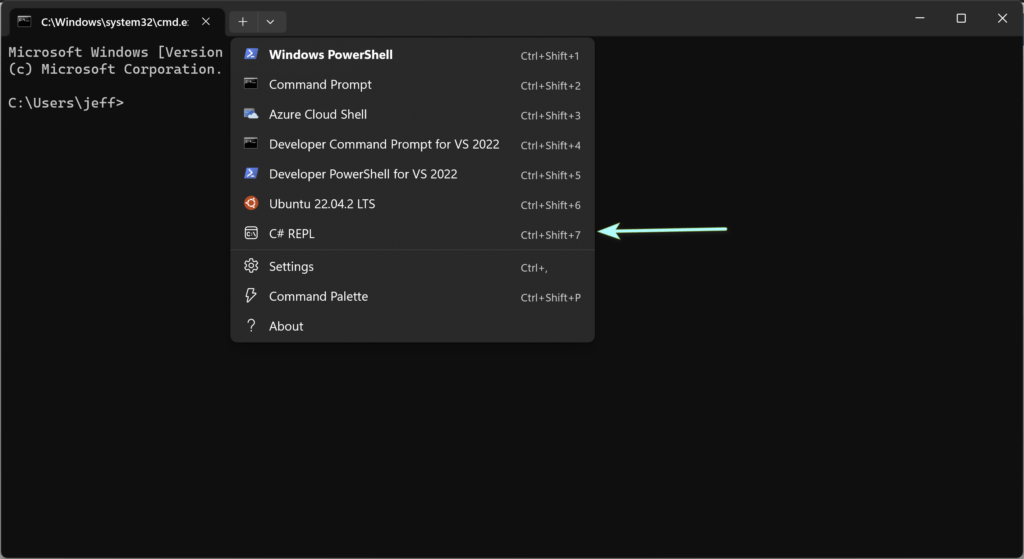
For even quicker access, you can also utilize the assigned hotkey to open a new C# REPL tab. In my case, it’s Ctrl+Shift+7 as shown in the screenshot above.
Summary
Wrapping this up, I’ve only been using C# REPL for a short while. That said, it didn’t take me long to get used to being able to quickly open up a C# REPL tab and typing up and executing C# code on the fly. If C# is one of your preferred languages, then I suspect you will find this tool super useful.
For all the nitty-gritty details, check out the C# REPL repo on GitHub.
As always, happy coding!
