TL;DR
The short version of this article is, if you are not currently using Microsoft PowerToys (assuming you’re on Windows 10 or 11), then stop what you’re doing and install them now. There are some great capabilities provided by the PowerToys that you will no doubt find useful.
For a bit of a history lesson and an overview of whats available in Microsoft’s PowerToys, including my two favorite PowerToys, read on!
A Really Short PowerToys History Lesson
If you’ve been using Windows long enough, you might recall PowerToys for Windows 95 or PowerToys for Windows XP. If not, you might recall other PowerToys releases provided by Microsoft over the years, including:
- PowerToys for Windows 95
- PowerToys for Windows XP
- PowerToys Fun Pack
- PowerToys for Windows Media Player for Windows XP
- And more (you can read more about the full history here)
The PowerToys are a collection of various utilities provided by Microsoft to augment Windows, Microsoft Office, etc. that provides additional functionality not included in the product. Some of the capabilities provided seemed, at least to me, to be more useful than others. For example, the Command Prompt Here PowerToy (which was eventually baked into the OS) was something I often made use of. Others felt more like novelties (toys?), for example, the ability to have a round clock without a square border. Regardless, the capabilities provided by the PowerToys was a nice addition to Windows.
PowerToys for Windows was retired with the introduction of Windows 7.
And… It’s Back!
After sitting out for Windows 7 & 8.x, PowerToys have made a comeback in Windows 10. This time, Microsoft made the (wise) decision to open source the PowerToys, which can be found here on GitHub. If you take a quick look at the Pulse of the project, you’ll see the project is, and has been, quite active.
One issue I recall with the original set of PowerToys (e.g., for Windows 95 & XP) was that it would take a really long time for updates or new features to be released. With the latest version of Microsoft PowerToys, it seems like new updates are released every two or three weeks (general observation – I didn’t actually check the data). These updates are generally comprised of bug fixes but it’s not unusual to see a new feature pop in every so often.
So, What’s Available in the Microsoft PowerToys?
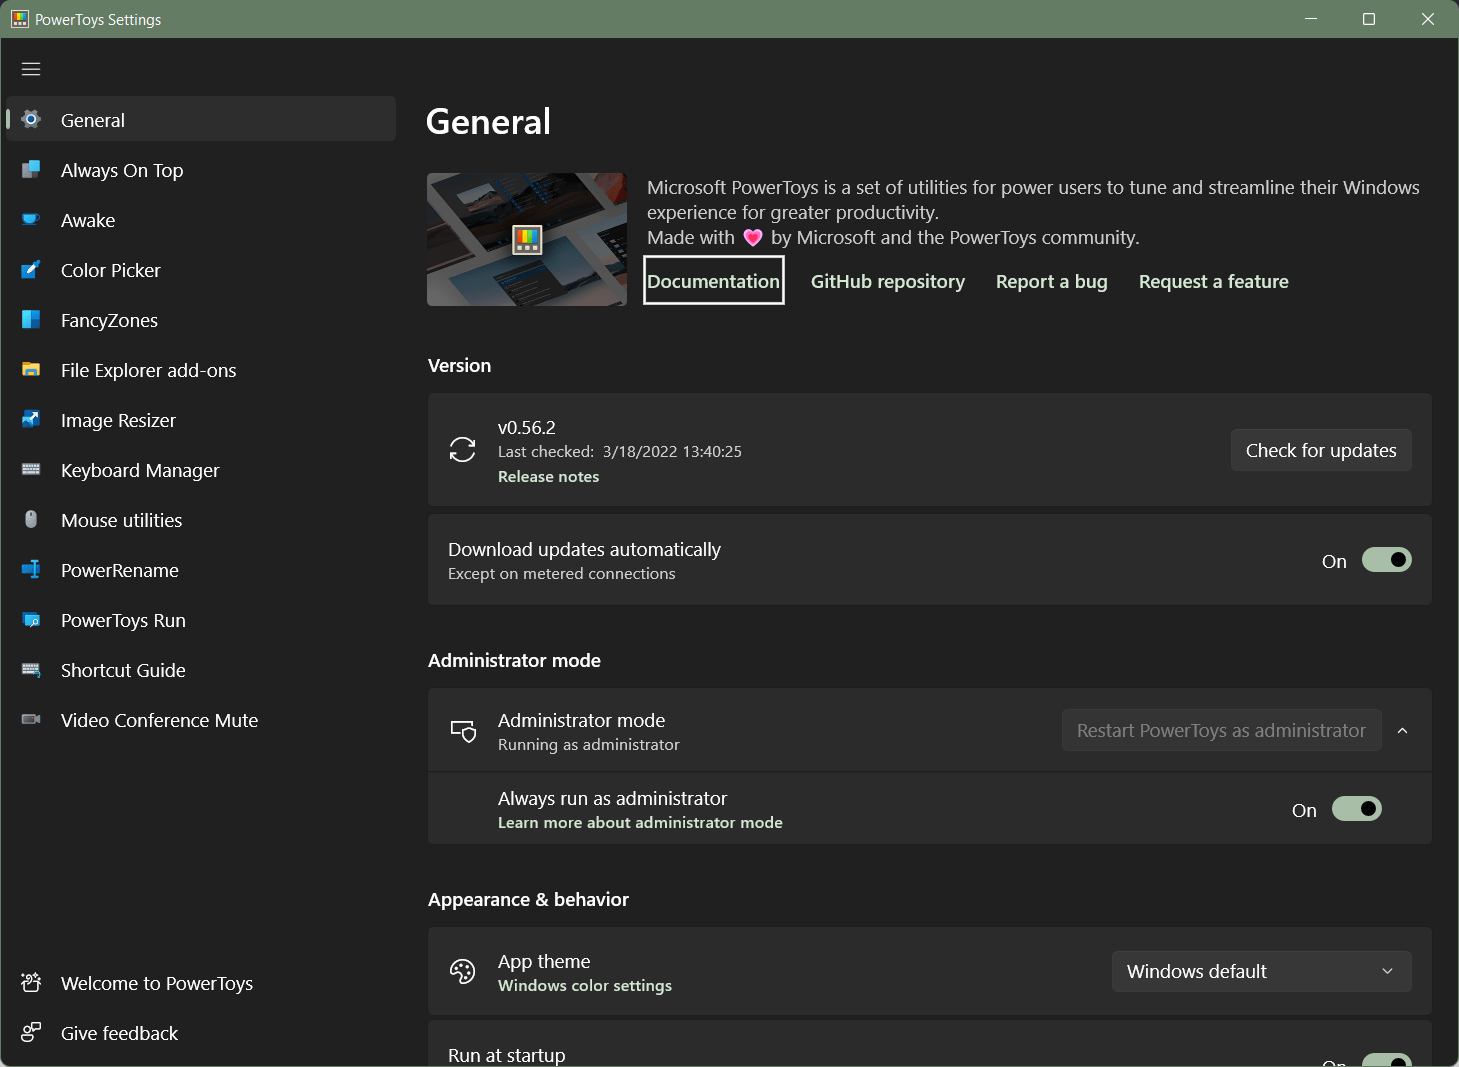
As of this writing, the following PowerToy utilities are included:
- Always On Top – provides an easy way to set a window to always be on top. This can be easily toggled with a hotkey and is super handy for certain apps such as the Calculator.
- Awake – allows you to keep your PC awake on-demand. For example, you can enable Awake and set it for some length of time (e.g., 2 hours) and your PC won’t go to sleep during that period. Once the period has expired, your PC’s normal power schedule will resume. You can also set it to be awake indefinitely (until you turn it off).
- Color Picker – activated via a hotkey, Color Picker lets you move your mouse around the screen showing you the exact color under the mouse. The color value can be viewed in a lot of formats, such as Hex, RGB, HSL, HSV, CMYK, and so on.
- FancyZones – this is one of my favorite PowerToy utilities. So much so, I discuss it in more detail in the next section (FancyZones FTW!).
- File Explorer add-ons – provides a set of capabilities such as enabling SVG, Markdown, PDF, and various developer files in the File Explorer preview pane.
- Image Resizer – lets you quickly resize images by right-clicking them in the File Explorer. You can setup various size profiles to quickly resize images to fit your specific needs.
- Keyboard Manager – lets you configure your keyboard by remapping keys and shortcuts. I used this feature to remap the Right ALT key on my keyboard (I don’t ever recall using this key before installing PowerToys) to ALT+Space, which is the keyboard mapping for PowerToys Run (see below).
- Mouse Utilities – various mouse utilities, such as a mouse highlighter and mouse crosshairs. But my favorite feature provided by Mouse Utilities is Find My Mouse. Pressing the left control key twice will dim your screen and place a spotlighted circle around your mouse. Very handy when using multiple monitors.
- PowerRename – allows you to quickly rename files in bulk using regular expression matching.
- PowerToys Run – this is my second most favorite PowerToy (next to FancyZones) provided in the PowerToys collection. I dig deeper into this feature below in: I’m Done With Start!.
- Shortcut Guide – this is a quick-n-simple feature that will display a screen overlay showing a set of shortcut keys that are available. Handy in the beginning until you memorize the most common shortcuts.
- Video Conference Mute – if you’ve ever wanted a global hotkey that “mutes” your microphone as well as your camera, here you go!
My Two Favorite PowerToys
FancyZones FTW!
If you are using wide monitors, you might find that the apps you make use of don’t always take advantage of the video real estate available to it. You can manually resize apps and move them around the screen, but when you open another app, you have to resize and move it accordingly. Also, when you close an app and then later reopen it, you have to repeat the process once again.
FancyZones addresses this issue by allowing you to setup “zones” on your screen that you can quickly place an application in. And, what’s more, when you close an app and later reopen it, it will open in the zone from which it was last closed. Cool!
To select a FancyZone layout, or to create a new layout, open the layout editor (e.g., Windows + ` ), which looks something like this:
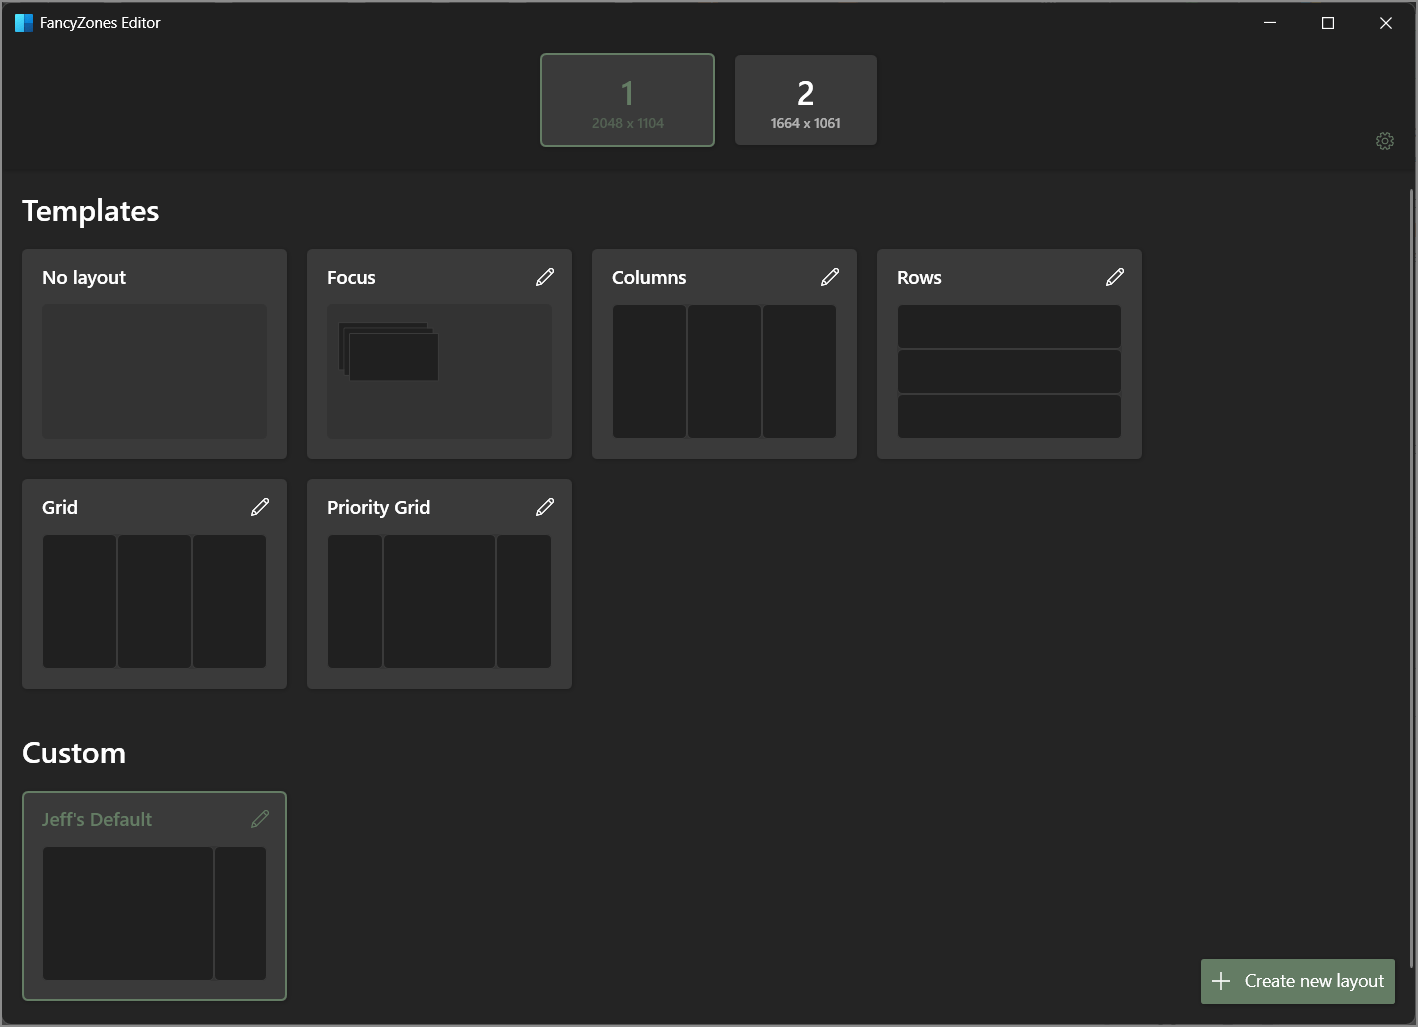
There are some built-in templates (layouts) provided out of the box in the Templates section. You can see I also have a custom layout called “Jeff’s Default”. This is the default layout I use on my wide monitor when connected to my laptop. For example, my To Do list is generally docked in the right-most zone and my browser in the larger, left-most zone.
The editor lets you create just about any layout you can think of, so long as it can be described in a set of squares and rectangles that fit within the confines of your monitor. You can also apply different layouts to different monitors. So, if you have multiple monitors, as I do, you can have different layouts for each. To make it easy to switch among your layouts, you can also assign an index to each one that can be used in conjunction with Win+CTRL+ALT, e.g., Win+CTRL+ALT+1.
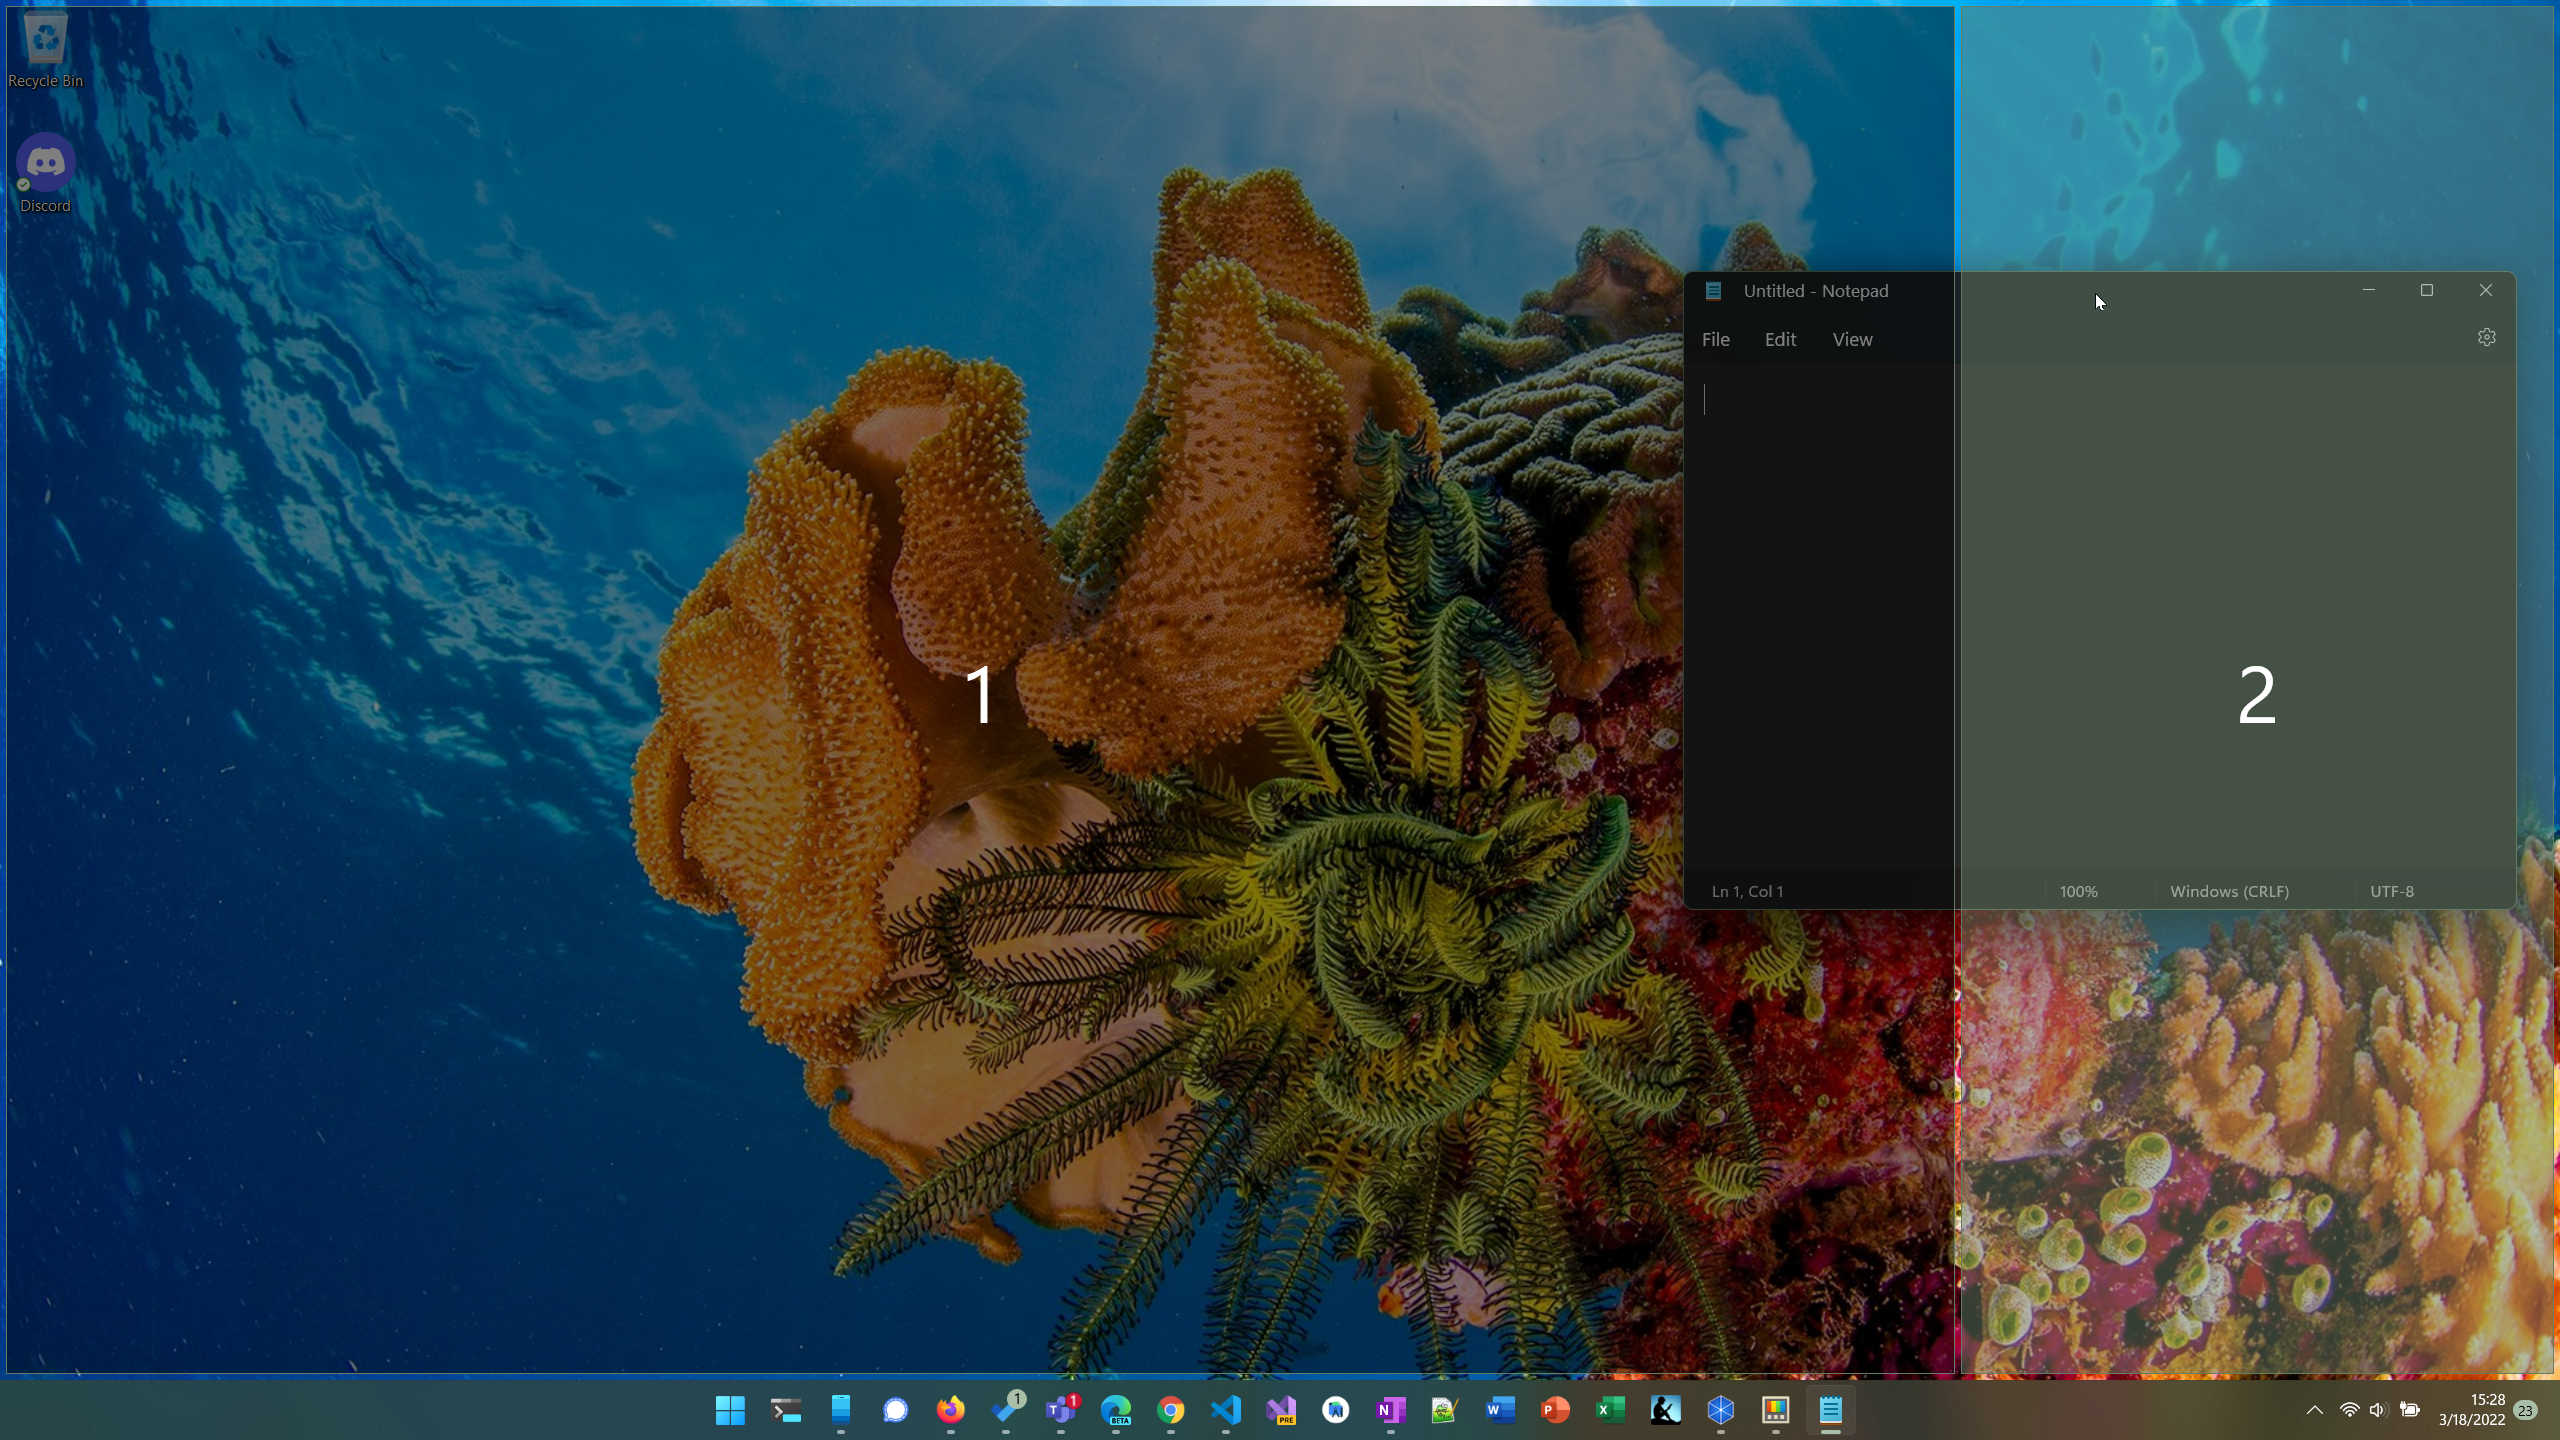
Docking an app to a specific zone is as easy as dragging the app into the zone while holding down the SHIFT key. As you do this, the various zones will be highlighted on the screen making it super easy to place your apps exactly where you want them. You can see this in action in the screenshot below; Notice that zone “2” is highlighted as I drag the Notepad app into its boundaries, while zone “1” is dimmed.
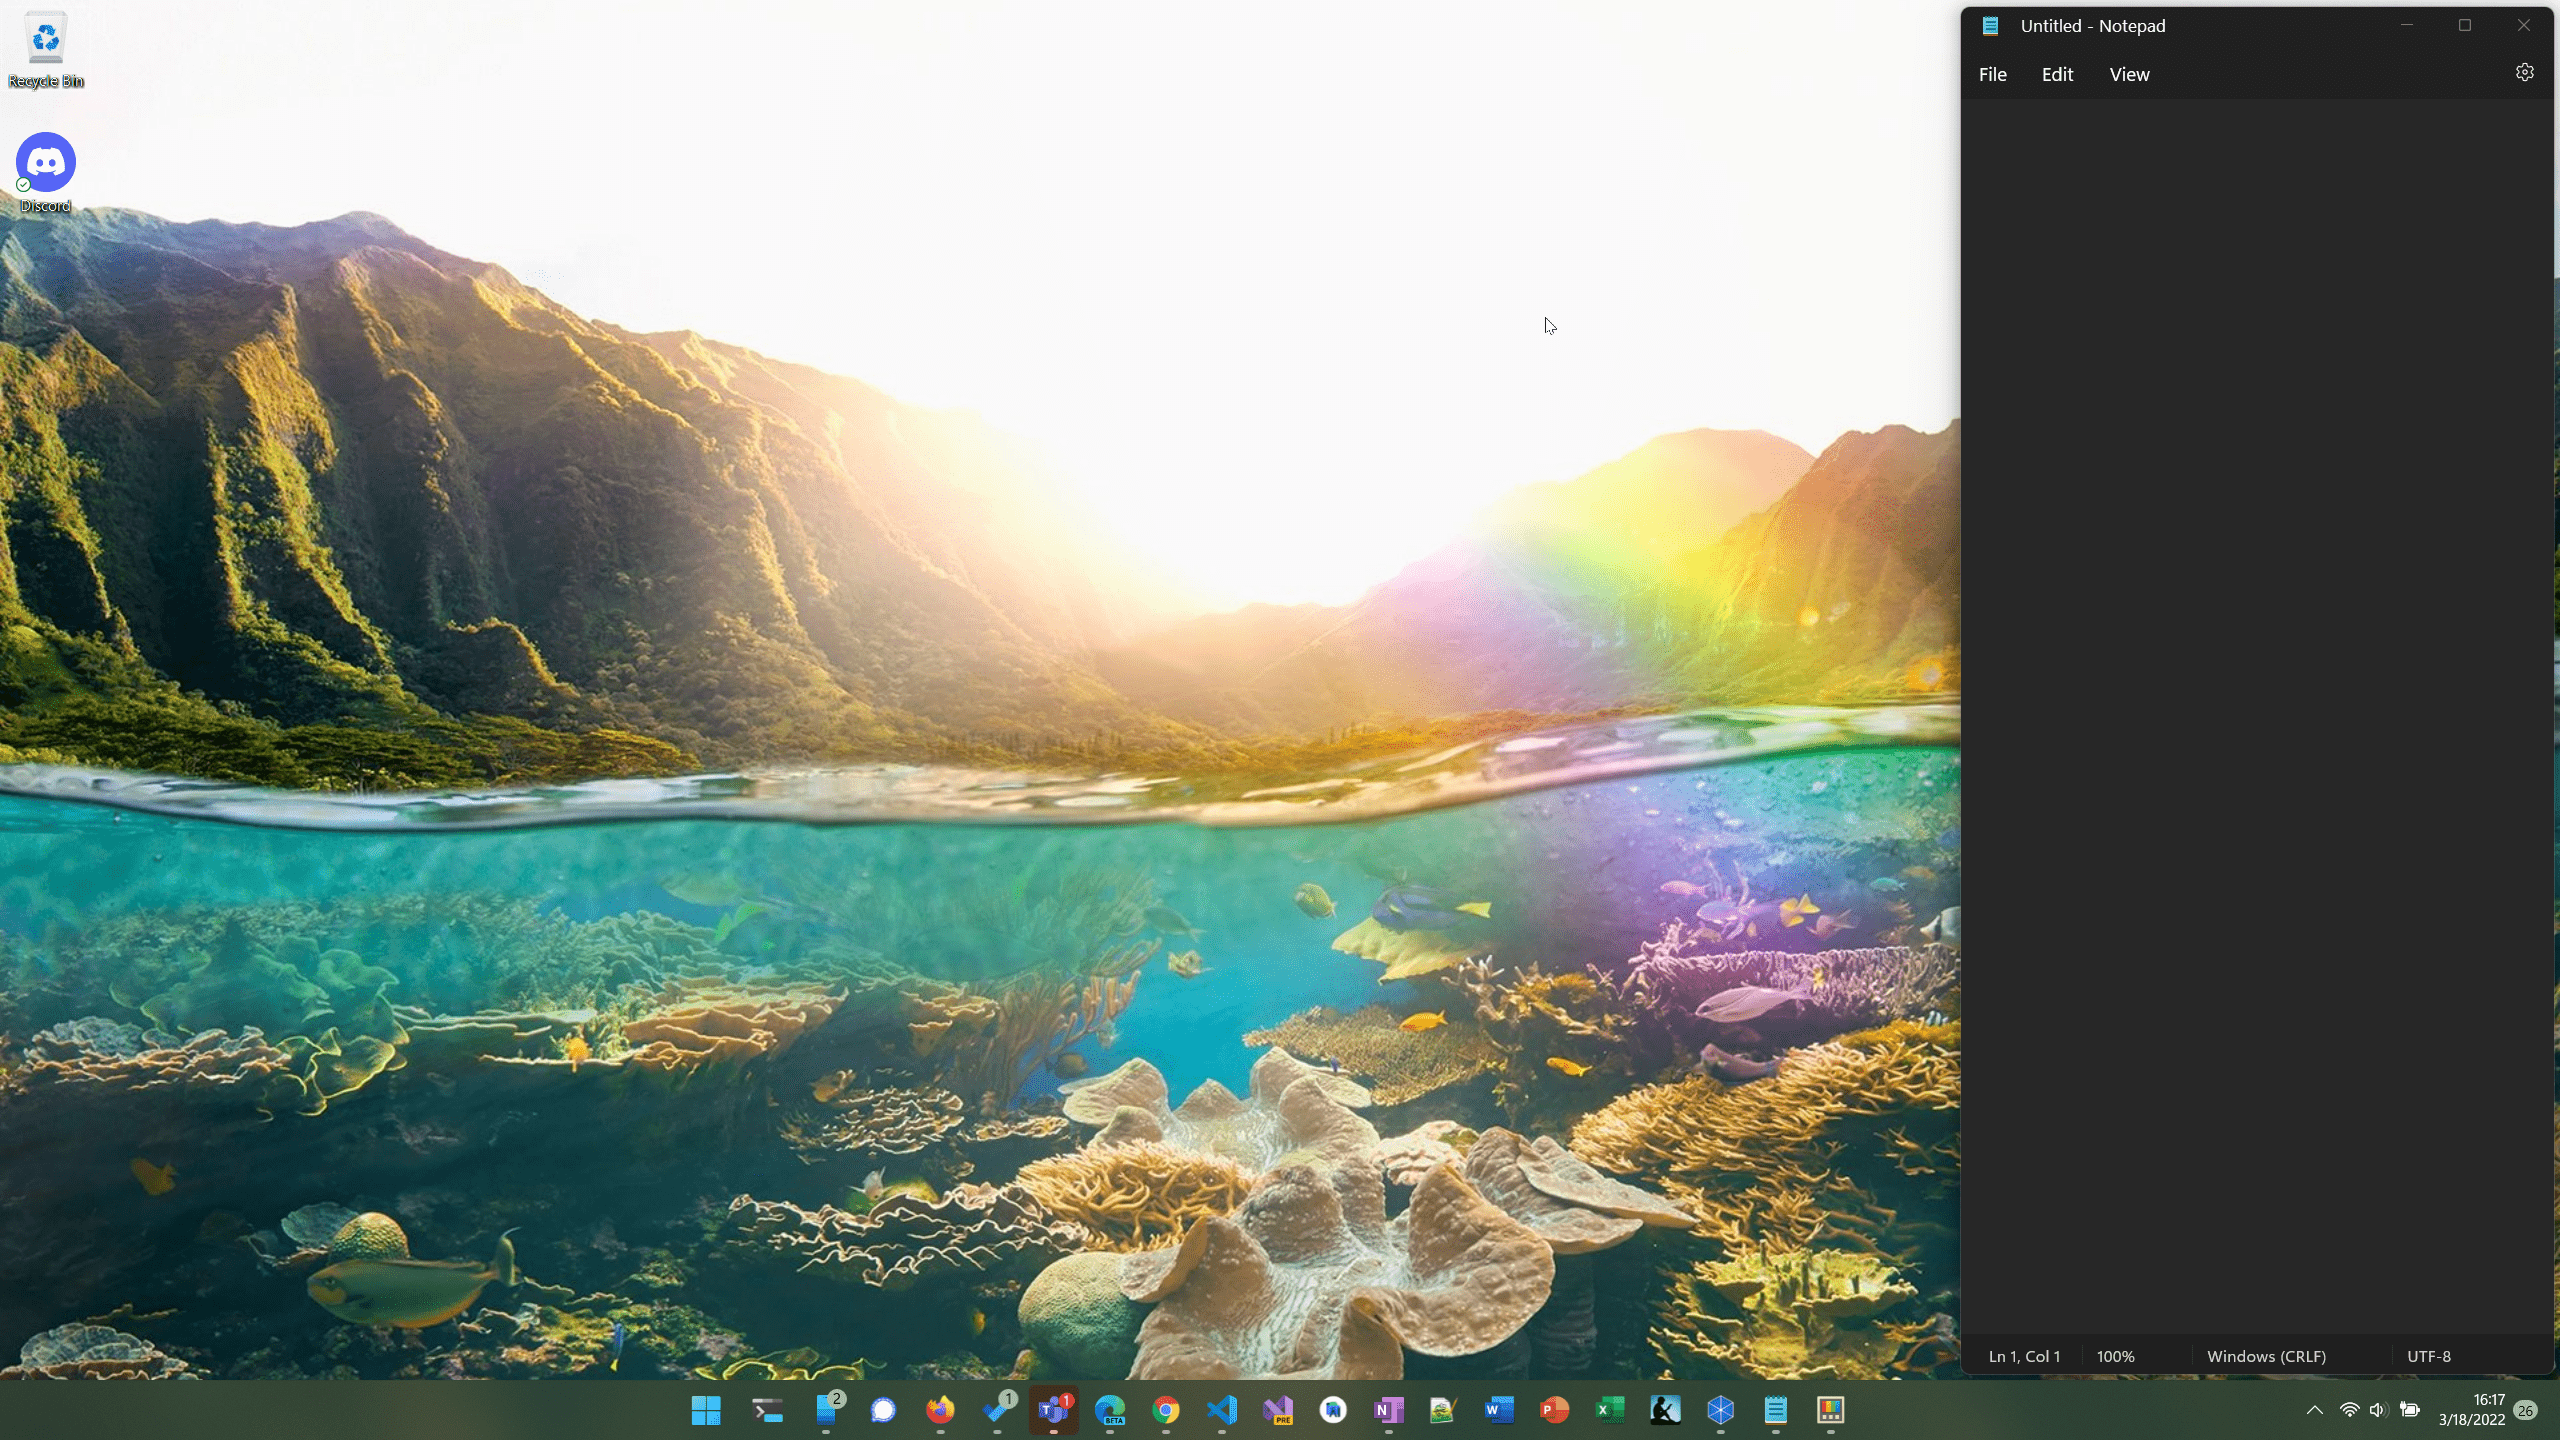
When I let go of the mouse button, you can see that Notepad has resized to fill the selected zone:
This is the killer feature that got me to download Microsoft’s PowerToys to start with. If you haven’t tried this feature out yet, give it a go. It will quickly improve your ability to organize your apps on your monitor(s).
Done With Start!
For as long as I can remember now, I haven’t clicked on the “Start” menu in Windows (other than to shutdown or restart). I don’t really care about seeing all the apps and other shortcuts that might be pinned there. I tend to simply hit the Windows key and start typing the name of the app that I want to launch (assuming I don’t already have it pinned to the taskbar). This has served me well for many years.
Then, Windows 11 came along…
I really hate (HATE!) the Start menu in Windows 11. Outside of some basic customization with the Pinned section (e.g., changing which icons are displayed and the order in which they are displayed), you really don’t have any control over how the Start menu looks. I would go so far to say as this menu provides literally no value for me. None!
Then PowerToys Run came along…
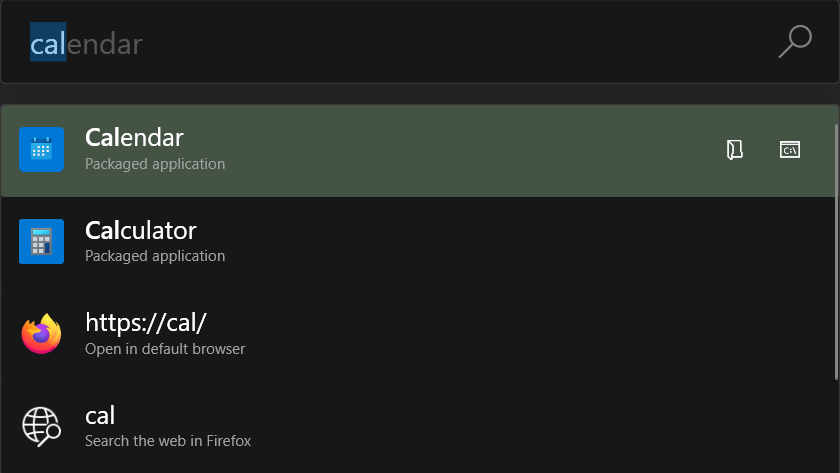
With PowerToys Run, I can press a simple hotkey (I have mine mapped to the Right-ALT key) and I am presented with a simple, clean menu:

From here, I can start typing and it will start suggesting possible options as I go:
In my humble opinion, this is a much better experience than the Start menu.
But wait, there’s more! There are lots of other things the Run PowerToy can do besides locating an app to run. There is a decent set of plugins (17 at the time of writing this article) that can be enabled (or disabled) to provide additional functionality.
For example, notice in the screenshot above that it was suggesting “https://cal/”. This can be disabled by turning off the URI Handler plugin.
There is also a Calculator plugin which I’ve found myself using quite often. To use it, simply open the PowerToys Run search window and start typing a formula:
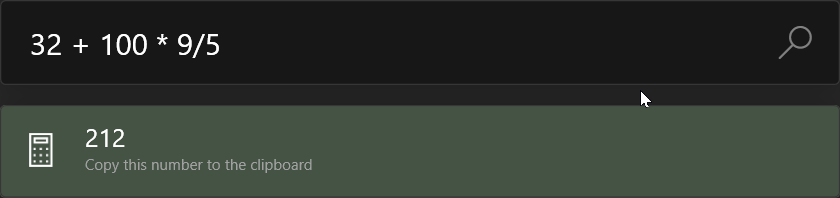
The results of the formula will be displayed as you type. Pressing the Enter key will copy the results to the clipboard.
The capabilities of the other plugins are also worth exploring but I won’t go into all of them here. Suffice it to say, I am a huge fan of PowerToys Run.
Summary
As stated in the TL;DR section at the very start of this article, if you haven’t already downloaded and installed Microsoft’s PowerToys, I recommend you do so. Having used just about every version of PowerToys released over the years, this set of PowerToys is by far the most useful of them all. You might not find value in each and every PowerToy, but you will no doubt find value in some of them.
As mentioned previously, FancyZones and Run are easily my two most favorite PowerToys. If you have a favorite, please share it with us in the comments below.
Thanks!